Xyron Easter Candy Pot
This is a cute little table decoration for holding all those yummy candy mini eggs. One again I used the super versatile We R Memory Keepers Hippity Hoppity stack and of course my 'can't do without' Xyron adhesive products.
 |
| Xyron Easter Candy Pot |
 |
| Using a mini terracotta pot and some florist oasis. |
 |
| Cover the oasis with a piece of coordinating paper |
 |
| Piece the centre of the card with a log wooden stick and run the ribbon and buttons through the x |
 |
| Fan fold the paper to make a wheel |
 |
| Runa diecut floral or circle piece of card for the back of the wheel through the 510 |
 |
| Run three coordinating floral die cuts and the candy topper through the 510 |
 |
Decorate the pot with the ribbin and buttons and fill with candy eggs
____________________________________ |
Xyron Easter Egg Hunt Bucket
This is a super simple bucket to create. I bought a mini bucket at my local hardware store and using the We R Memory Keepers Hippity Hoppity stack that I used for the Xyron Easter Bunting and some embellishments I ended up with a sute little bucket.
 |
| Xyron Easter Egg Hunt Bucket |
 |
| Run the ribbon throught the X |
 |
| Run the paper elements through the 510 |
 |
| Emboss the backing paper for dimension |
 |
| Run the backing paper through the 510 |
 |
| Run the mini buttons through the X |
 |
| Run the pom poms through the x |
 |
| Assemble the paper elements and use the bunnies left over from the bunting, apply the buttons and pom poms |
 |
| Run the buttons through the X |
 |
| Apply the buttons and pom poms to the bucketto finish |
_______________________________________
Xyron Easter Bunting
Spring has sprung, the garden is in bloom and the Easter Bunny is on his way. I made this bright and fresh Easter Bunting to celebrate. All put together with my Xyron products. Scroll down to see the products used and instructions
Xyron Creatopia
Xyron 510
Xyron X
Cricut Craft Room Exclusive Teresa Collins Bunnies and Chicks
Cricut Craft Room Basics
Cuttlebug Embossing folders
Sizzix Embossing Folder
We R Memory Keepers Hippity Hoppity Designer Scrapbook Pad
We R Memory Keepers large brads
docrafts Papermania Home Bunting Die Cuts Package
docrafts Capsule Collection paper lemon flowers
docrafts Capsule Collection lemon buttons
White pom pom's
Doodlebug sugar coating limeade glitter
Doodlebug large buttons
Mini buttons
Coloured Rafia ribbons
Mini Styrofoam eggs in organza
 |
| We R Memory Keepers Hippity Hoppity Pads |
 |
| docrafts Papermania die cut bunting pack |
 |
| Using the Cricut Basics cut out six base triangles approximately 5x7" |
 |
| Using the Cricut Basics cut out six slightly smaller triangles |
 |
| Using the Teresa Collins Bunnies and Chicks cut out eight 4" bunnies in yellow polka dot paper and eight slightly small bunnies in patterned card stock. ( I cut out extra to use on another project later). |
 |
| Pass the yellow base layer trangles trough a paper crimper |
 |
| Using The embossing folders give texture to your cutouts. |
 |
| Pass the yellow base triangles through the Creatopia. I used the repositionable adhesive. |
 |
| Pass the blue base triangles through the Creatopia. I used the repositionable adhesive |
 |
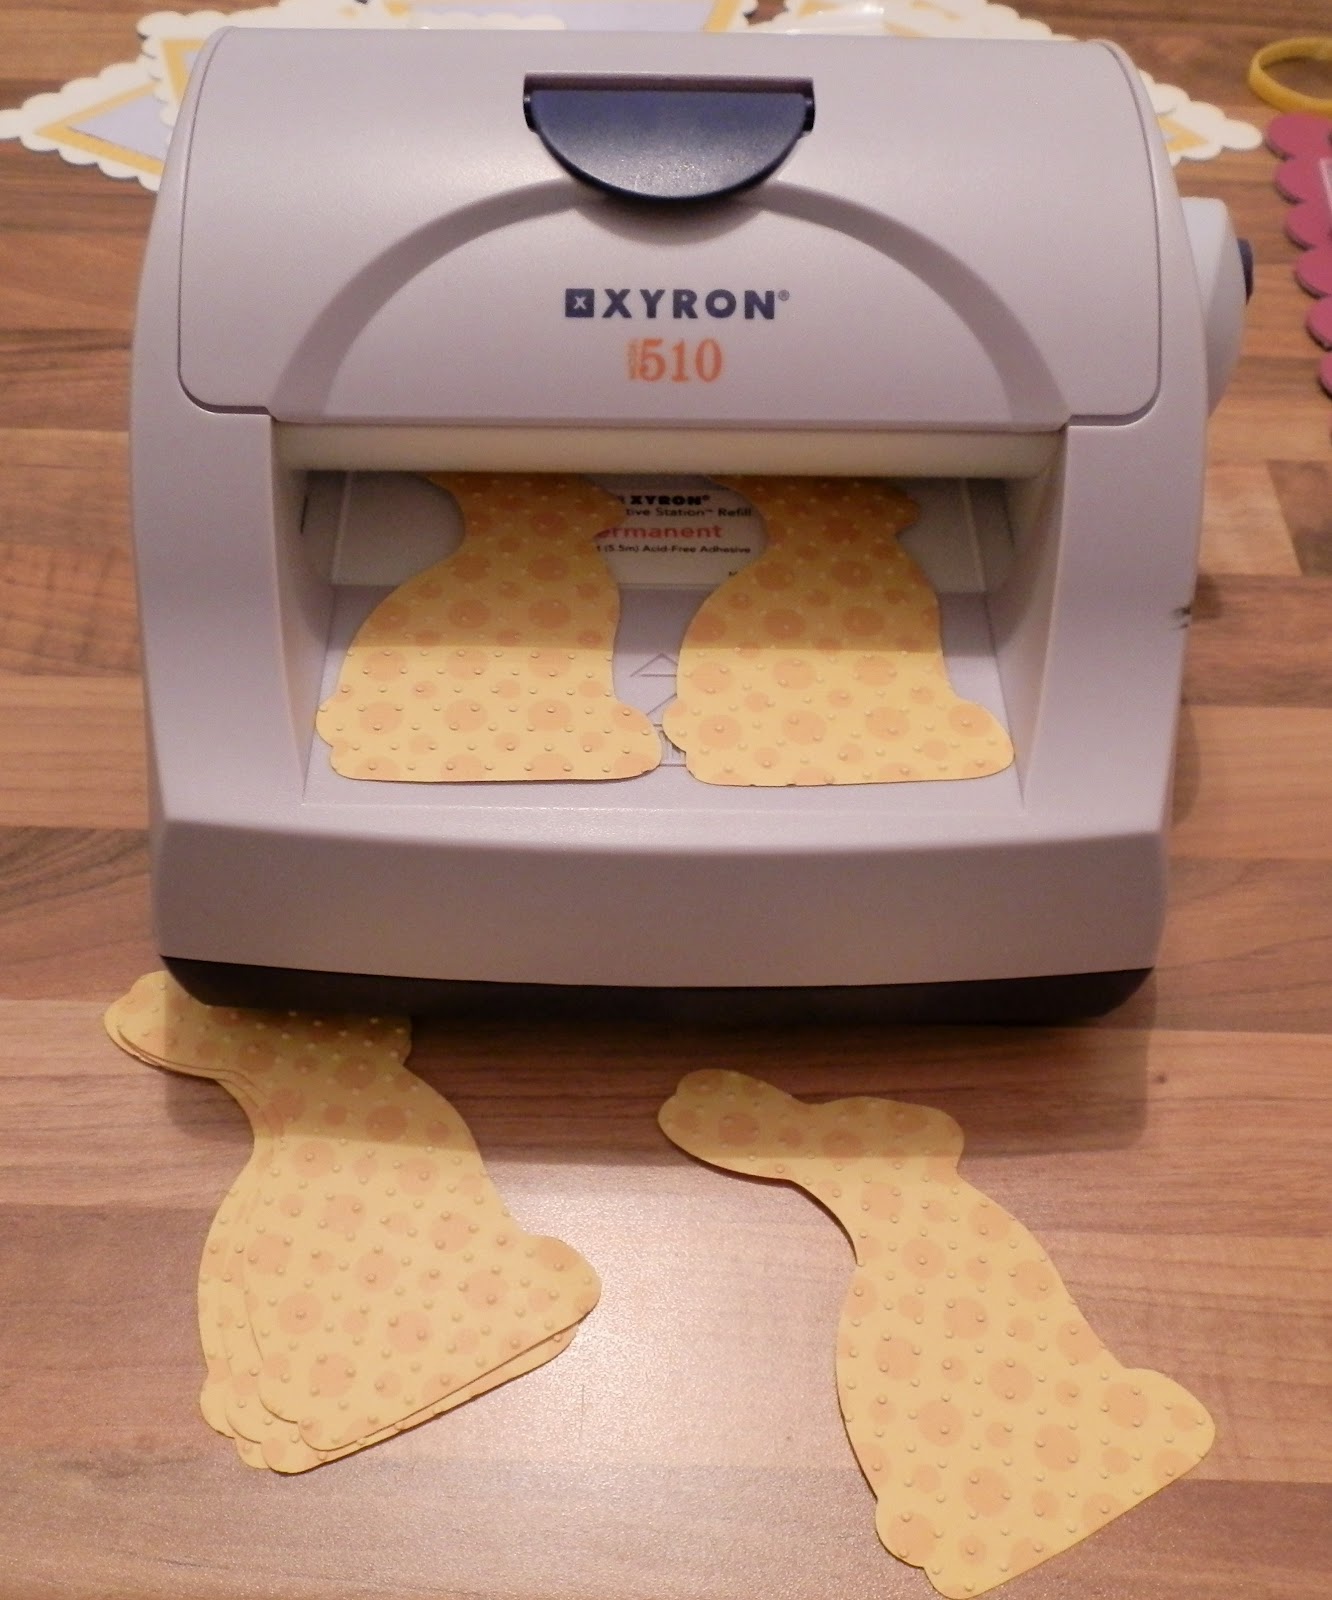
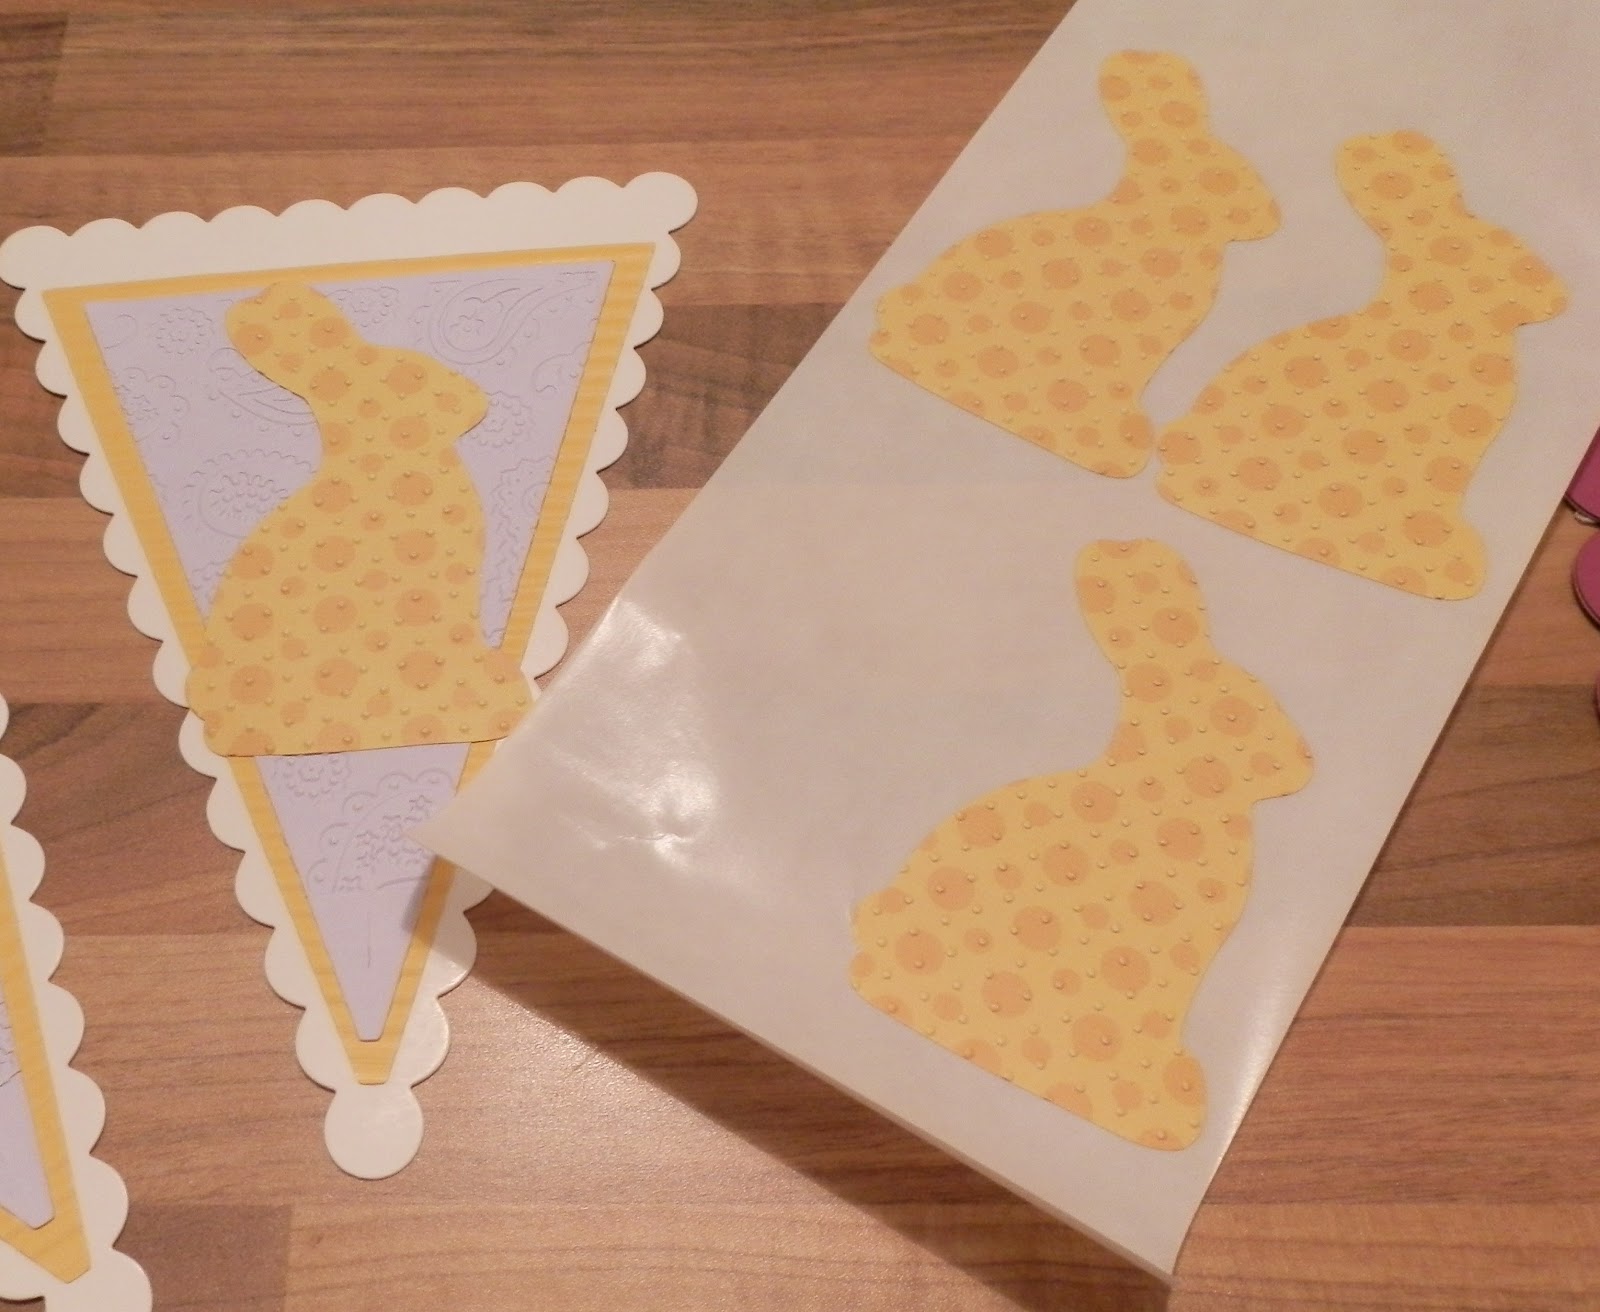
| Pass the bunnies through the Xyron 510 |
 |
| Tie ribbons or rafia around the bunny necks. |
 |
| Pass through the Xyron 510 |
 |
| Mat and layer the triangles |
 |
| Layer the base bunny |
 |
| Place the patterned bunny on top |
 |
| Using the letters included in the stack, place them in the center of the bunny |
 |
| Draw around the edge of the bunting with a glue pen and sprinkle with glitter. |
 |
| Start adding embellishments to the bunting. I used white pom pom's for the bunny tails. |
 |
| The Xyron X is great for buttons and flowers |
 |
| Punch the top corners and using large eyelets join the banner pieces to each other |


.jpg)

 |
| The banner can be curved inwards for display or stretched out and hung. |
Thank you so much for looking, Happy Easter x


.jpg)


Comments
Post a Comment
All comments subject to moderation.